
How to Plan Built-In Storage for Your Busy Waterloo Home (Room by Room)
Planning built-in storage for your Waterloo home starts with measuring every wall, nook, and vertical space you want to use, then matching those dimensions to your family’s actual daily habits and storage pain points. The process takes about two to three weekends from initial measurements to final design decisions, and you’ll need a tape measure, graph paper or a free digital planning app, and a realistic budget range before you start shopping materials or calling contractors.
Waterloo families know the challenge: winter gear piling up by the door, toys spreading across the living room, kitchen counters buried under small appliances, and bedroom closets that can’t keep up with growing kids. Built-in storage solves these problems permanently, but only when you plan with precision. Guessing at dimensions or copying Pinterest boards without adapting them to your space leads to expensive mistakes and storage that doesn’t actually fit your life.
The key difference between built-ins that transform a home and ones that disappoint comes down to planning. You need a room-by-room strategy that accounts for what you’re storing, how often you access it, and the specific dimensions of your walls and alcoves. Budget matters too. A well-planned project lets you prioritize high-impact areas first and phase the work over time if needed.
This guide walks you through the complete planning workflow, from taking accurate measurements to choosing between DIY and professional installation. You’ll learn how to assess each room’s storage needs, avoid common measurement errors, and create a project timeline that fits your budget. Whether you’re working with Canadian Custom Cabinets or building your own shelving, the planning steps remain the same.
What You’ll Need to Plan Your Built-In Storage
You don’t need a truck full of expensive equipment to plan built-in storage. Most of what you’ll use is already sitting around your house, and the few items you might need to buy cost less than $20 total.
Measuring Tools
A standard 25-foot measuring tape is your most important tool. You’ll use it to measure wall lengths, heights, depths, and the spaces around windows, doors, and outlets. If you’re planning storage in multiple rooms, a laser measure can speed things up, but it’s completely optional. A pencil and sticky notes help mark measurements directly on walls as you go.
Documentation Tools
Your smartphone camera does the heavy lifting here. Take photos of each wall from multiple angles, including close-ups of electrical outlets, vents, and any obstacles. These photos become invaluable when you’re designing later and can’t remember exactly where that light switch was positioned.
A simple notebook or notepad keeps all your measurements and ideas in one place. Write down the dimensions for each wall, sketch quick layouts, and jot down storage problems you notice in each room. This beats trying to remember everything or hunting through scattered scraps of paper weeks later.
Design and Planning Tools
For visualizing your built-ins, you have several free options:
- Graph paper and a pencil for hand-drawing layouts to scale
- Free apps like RoomSketcher or SketchUp Free for digital floor plans
- Simple spreadsheet software for tracking measurements and budget
- Pinterest boards or photo folders for saving inspiration images
A basic spreadsheet helps track costs as you research materials. List each project, estimated materials, hardware, and whether you’ll DIY or hire help. This running total prevents budget surprises and helps you prioritize which rooms to tackle first.
Before You Start: Important Planning Considerations
Before you dive into measuring and designing your dream storage, pause and check a few critical things that could save you from expensive mistakes or even safety hazards. Built-in storage sounds simple, but you’re committing to permanent changes to your home’s structure.
First, figure out what’s hiding behind those walls. Waterloo homes, particularly older ones in established neighborhoods, often have electrical wiring, plumbing pipes, or HVAC ducts running through walls that look perfectly innocent. Before you mark where shelves will anchor or where you’ll mount heavy cabinets, use a stud finder with wire detection or hire an electrician to scan the area. Drilling into live wiring or puncturing a water line turns a weekend project into an emergency repair situation.
Load-bearing walls are another stop condition. If your plan involves removing any portion of a wall or cutting into studs to create recessed storage, you need to know whether that wall is holding up the floor above. Removing or weakening a load-bearing wall without proper support can cause serious structural damage. When in doubt, consult a structural engineer or experienced contractor.
Speaking of experts, recognize when to call pros versus handling planning yourself. Complex projects involving electrical relocation, plumbing adjustments, or structural modifications need professional input, even if you do the cosmetic work yourself.
Budget reality matters too. It’s easy to sketch elaborate floor-to-ceiling custom cabinetry for every room, then discover the quote is three times what you can spend. Be honest about your budget from day one, and plan projects you can actually afford to complete.
Finally, set realistic timelines. Busy families can’t live in construction chaos for months. Plan projects in manageable phases that won’t disrupt daily routines for extended periods, and build in buffer time for unexpected delays.
Step-by-Step Planning Process
Step 1: Assess Each Room’s Storage Pain Points
Start by walking through your home with a fresh perspective. Grab a notebook and spend 15 minutes in each room, but don’t organize anything yet. You’re just observing where stuff piles up naturally.
Notice the spots where clutter always returns no matter how many times you tidy. That coat mountain by the front door? The toys that migrate under the coffee table? The bathroom counter buried in hair products? These patterns tell you exactly where built-in storage needs to work hardest.
Create a simple table with four columns: Room, Problem Area, What’s Cluttering, and Why It Lands There. Be specific. Instead of writing “bedroom messy,” note “kids dump backpacks and shoes just inside bedroom door because the closet is across the room and they’re tired after school.”
Pay attention to your family’s actual movements throughout the day. Where do you drop your keys when you walk in? Where do kids naturally want to leave their sports gear? The best built-in storage works with your habits, not against them.
Count items that currently have no proper home. How many jackets per family member? How many pairs of shoes accumulate by each entrance? This inventory prevents building storage that’s too small before you even start.
Take photos of problem areas from multiple angles. You’ll reference these later when designing solutions that fit the actual space and workflow.
Step 2: Measure and Document Your Spaces
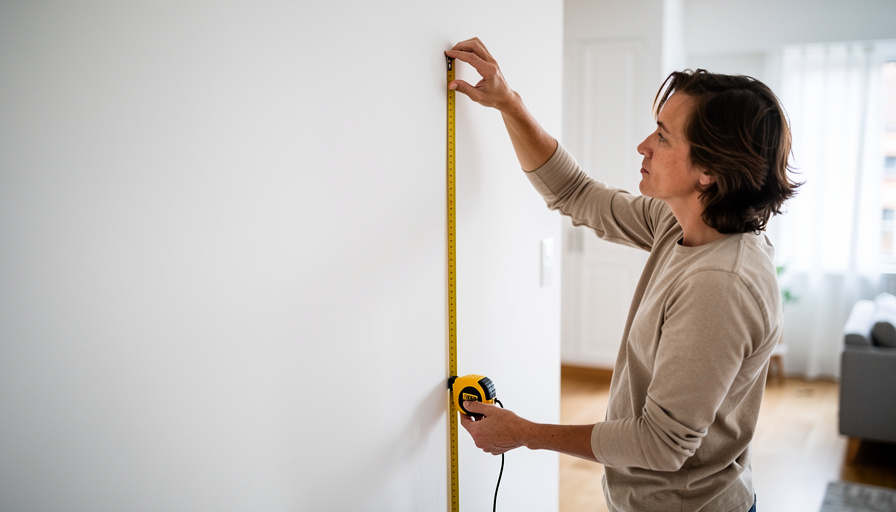
Once you’ve identified your storage pain points, it’s time to get precise with measurements. Grab your measuring tape and notebook, accuracy here prevents expensive mistakes later when you’re ready to build or hire someone.
Start with a systematic approach to capture everything you’ll need:
- Measure wall lengths from corner to corner, writing down each dimension twice to catch any errors. For walls longer than your tape measure, mark the midpoint and measure in sections.
- Record floor-to-ceiling height at multiple points along each wall, since older Waterloo homes often have slight variations that matter when installing tall cabinets.
- Measure how much depth you can realistically use without blocking walkways or doors. Standard built-ins sit 12-18 inches deep, but shallow spaces might only allow 8-10 inches.
- Mark the exact location and size of every obstacle: windows (from floor to sill and total width), doors (including swing clearance), electrical outlets, light switches, heating vents, and radiators.
- Note any baseboard or crown molding heights, since you’ll need to work around or match these trim elements.
Don’t rely on memory. Snap photos from each corner of the room, capturing the full wall and any quirks like sloped ceilings or awkward nooks. Take close-ups of electrical boxes and vents so you remember their exact placement. These photos become invaluable when you’re sketching layouts later or explaining your vision to a contractor.
Double-check measurements for the walls where you’re planning your first built-in project. A quarter-inch mistake multiplied across a ten-foot wall creates noticeable gaps.
Step 3: Match Storage Solutions to Each Room’s Needs
Now that you’ve measured everything, it’s time to match storage solutions to how your family actually lives in each room. Think about your daily routines and where chaos happens most.
Mudroom and Entryway
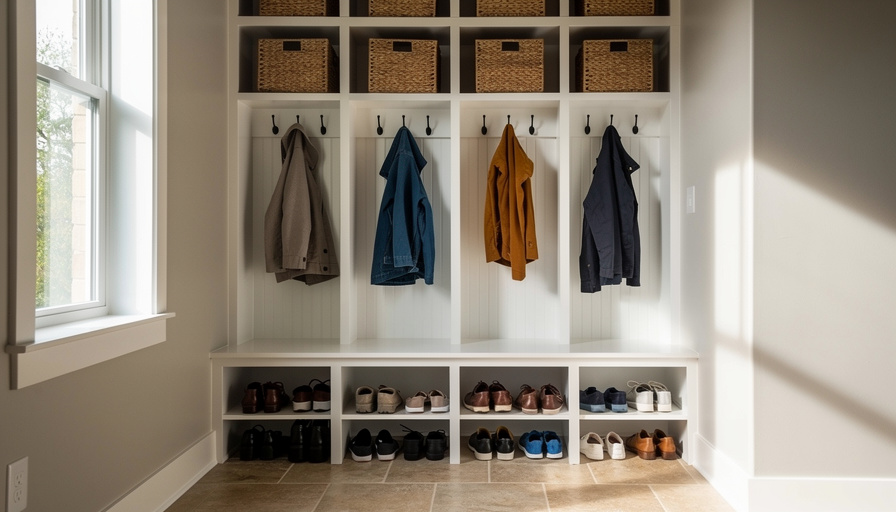
This space takes a beating in Waterloo homes, especially during winter. Plan a bench with hidden storage underneath for hats, mittens, and scarves. Above it, mount coat hooks at different heights so kids can reach theirs without dragging coats on the floor. Shoe cubbies with removable trays make cleaning up salt and slush easier. If you have wall space near your front door paint add narrow shelving for keys, mail, and sunglasses.
Kitchen
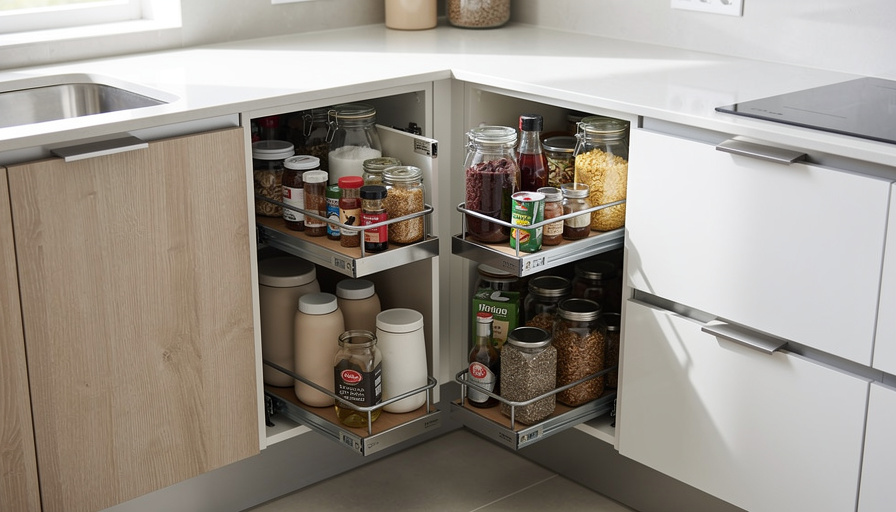
Pantry pull-outs transform deep cabinets from black holes into usable space. Plan sliding shelves that bring everything forward so you can see what you have. Corner cabinets work best with lazy Susans or pull-out systems that access those awkward triangular spaces. For busy families, consider a coffee station with built-in storage for mugs, pods, and supplies in one dedicated spot.
Bedrooms
Closets need vertical thinking. Built-in systems with adjustable shelves and double hang rods help you maximize closet space as kids grow or seasons change. Window seats with flip-up lids offer bonus storage for bedding, off-season clothes, or toys while creating a reading nook. Plan drawer units for folded clothes instead of dressers to save floor space.
Bathrooms
Medicine cabinets with interior shelving keep daily items accessible but hidden. Plan linen storage between wall studs if you have the depth. Tall, narrow built-ins fit beside toilets or in corners and hold more than you’d expect.
Home Office
A built-in desk with integrated filing drawers keeps work contained. Plan shelving above the desk for books and organization tools. Include cord management cutouts if you’ll have electronics.
Living Areas
Media centers with closed cabinets hide gaming systems and remotes while displaying a few favorite items on open shelves. For families with young kids, plan low built-in bins or cubbies where toys go at cleanup time.
Step 4: Sketch Your Layout and Set Your Budget
With measurements and room-specific needs mapped out, it’s time to turn your ideas into a workable plan.
Start with simple sketches on graph paper, letting each square represent a foot. Draw the wall where your built-in will sit, marking windows, doors, and outlets. Sketch in your storage unit with basic boxes showing height and depth. This low-tech approach costs nothing and lets you experiment quickly. If you prefer digital tools, SketchUp Free or RoomSketcher offer intuitive interfaces for creating 3D visualizations you can view from different angles.
Next, add up what everything will cost. Price out materials at local Waterloo suppliers like Home Depot on Ira Needles or smaller lumber yards. For a basic 8-foot mudroom bench with cubbies, expect plywood sheets to run $60-80, hardware another $40-60, and paint or stain around $30. Compare options: melamine-faced particleboard costs half what birch plywood does but works fine for low-traffic areas. Build a spreadsheet listing each project with material costs, tool purchases if needed, and a 15% buffer for mistakes or changes.
Now comes the honest conversation about DIY versus hiring help. Simple open shelving or a basic bench? Most handy homeowners can tackle these weekend projects. Floor-to-ceiling closet systems with multiple drawers, or anything requiring electrical work? Get quotes from local carpenters. Mixing approaches saves money, you might install prefab closet organizers yourself but hire someone for custom kitchen pantry pull-outs.
If you’re planning storage for multiple rooms, rank projects by urgency and budget. Tackle the mudroom chaos first, then move to bedrooms once you’ve learned from the initial build. Spread projects across 6-12 months to manage both your budget and your family’s tolerance for ongoing construction.
Step 5: Choose Materials and Finishes
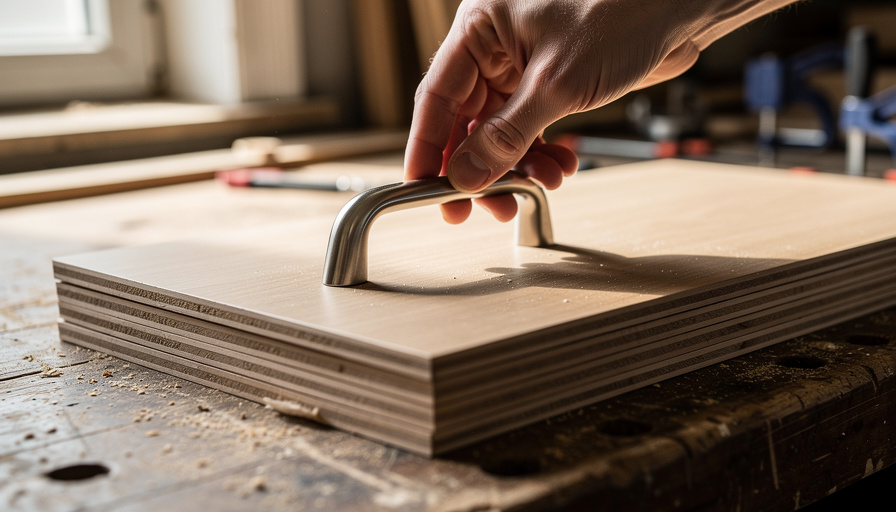
Pick materials that fit both your budget and how your family actually lives. Plywood delivers strength and a clean edge for shelves that’ll hold heavy books or bins without sagging, but it costs more upfront. MDF works well for painted built-ins on a tighter budget and takes budget cabinet paint beautifully, though it doesn’t handle moisture like a bathroom or mudroom as well. Solid wood looks gorgeous and lasts forever, but save it for visible fronts or accent pieces rather than entire units.
For finishes, match your existing trim color if you want built-ins to feel original to the house, or choose a contrasting shade to make them a design feature. Semi-gloss or satin paint stands up to fingerprints and wipes clean easily in high-traffic spots. Splurge on quality hinges and drawer slides since cheap hardware fails quickly with daily use, but standard knobs and pulls from home centers work fine. Skip fancy crown molding on closet interiors where nobody sees it, and put that money toward durable materials where kids’ hands actually touch.
How to Know Your Plan Is Ready
Before you pick up a hammer or call a contractor, run through this final checklist to make sure your built-in storage plan is truly ready for action.
Start by double-checking your measurements. Go back to each planned location with your tape measure and confirm wall lengths, heights, and depths match what you wrote down. Measure twice, build once isn’t just a saying. A mistake of even two inches can mean wasted materials or a built-in that doesn’t fit. While you’re measuring, take fresh photos of each space and compare them to your sketches to catch any obstacles you might have overlooked the first time.
Next, honestly ask yourself if this plan solves your actual storage problems. Look back at your room-by-room pain points from Step 1. Does each built-in address a real clutter issue your family faces daily, or did you get carried away designing something that just looks nice? If you planned a gorgeous window seat but your real problem is scattered shoes by the door, redirect your focus.
Review your budget numbers with fresh eyes. Add up material costs, hardware, any tools you need to buy, and contractor fees if applicable. Then add 15% for the inevitable surprises and price increases. If the total makes you uncomfortable, scale back now rather than halfway through construction.
Check that your timeline actually works with your family’s schedule. Building built-ins means disruption. Can you realistically handle a torn-apart mudroom during the school morning rush, or should you plan that project for summer break?
Finally, think ahead. Will this storage system still work when your toddler becomes a teenager with different stuff? If you shift to more remote work, does the plan accommodate that? Build in some adjustable shelving or flexible zones rather than custom-fitting everything to today’s exact needs.
If you’ve ticked all these boxes, you’re ready for next steps. Get final quotes from contractors if you’re hiring help, or head to the lumberyard to purchase materials for your first DIY project. Start with one room, nail the process, then move on to the next.
Common Planning Questions
How much does built-in storage cost on average?
Budget-friendly built-ins start around $200-$500 for simple open shelving or mudroom hooks you install yourself. Mid-range projects like closet systems run $800-$2,000, while custom cabinetry from a professional can reach $3,000-$8,000 per room depending on size and materials.
Can I plan built-ins for a rental?
Yes, but focus on removable or minimal-damage options like freestanding shelf units that look built-in, tension-mounted closet rods, or wall-mounted systems secured to studs with patched holes. Always get landlord approval before drilling into walls or making permanent changes.
What’s the best first project for beginners?
Start with an entryway wall of hooks and a simple shoe shelf. It’s a small space with visible impact, requires basic tools, and teaches you measurement and mounting skills without the complexity of full cabinetry.
How do I plan for future flexibility?
Choose adjustable shelving systems with movable brackets, modular cubbies that reconfigure easily, and standard dimensions that work for multiple purposes. Leave some open space rather than filling every inch, so the storage can adapt as your family’s needs change.
Should I match existing trim and cabinetry or go for contrast?
Matching creates a cohesive, high-end look that suggests the built-ins were original to the home. Contrasting can work if you’re intentional about it, like painting built-ins in an accent color while keeping the same style details as your trim.
Do built-ins add home value in Waterloo?
Quality built-ins typically add value because they increase functional storage space, which buyers actively seek. Focus on classic designs in kitchens, mudrooms, and primary bedroom closets rather than highly personalized solutions that might not appeal broadly.
These questions come up constantly when homeowners start planning, and the answers shape realistic expectations. If your situation doesn’t fit neatly into these scenarios, that’s normal. Think about what makes your household unique and adjust the planning approach to match those specific needs rather than following a template blindly.