
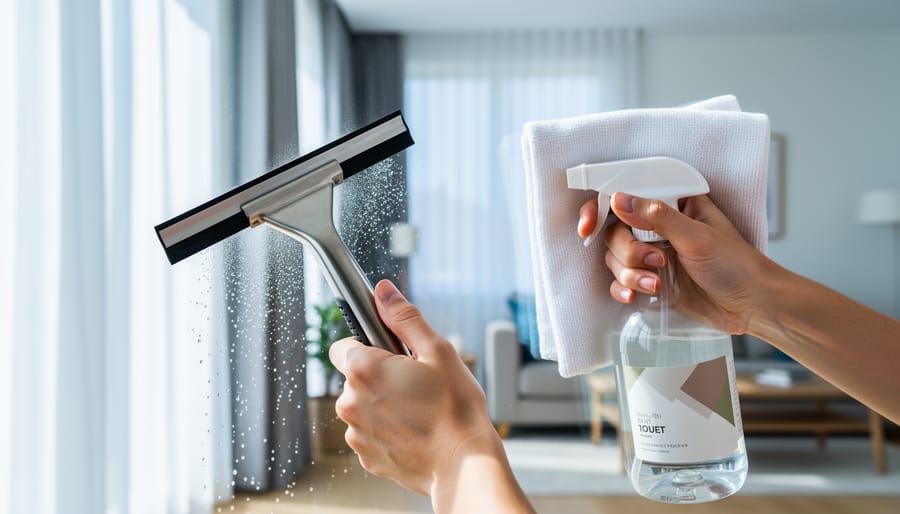
How to Clean Your Windows Streak-Free in Under an Hour (Small Home Edition)
You can get perfectly streak-free windows in your small home this spring using just three budget-friendly supplies and a simple two-step wiping technique that professional cleaners rely on. The process takes about 30 minutes for an average apartment or small house, and the secret lies in using the right tools (a squeegee beats paper towels every time) plus working in a specific pattern that prevents drips and residue.
Spring cleaning your windows feels like a game of whack-a-mole when you’re battling streaks. You wipe one section, it looks perfect, then the sun shifts and suddenly you’re staring at smudges everywhere. In a small home, this problem feels even more obvious since every window plays a bigger role in your natural light and overall vibe. The good news? You don’t need expensive cleaners or professional equipment to solve this.
Small spaces actually give you an advantage here. You can complete the entire job in one focused session without breaking your back or your budget. Most people make the same handful of mistakes (using too much cleaner, working in direct sunlight, or choosing the wrong cloth), and once you know what to avoid, the whole process becomes straightforward. Whether you’re refreshing your space for the warmer months or just tired of looking through grimy glass, this guide walks you through exactly what to buy, how to prep your windows, and the step-by-step method that delivers crystal-clear results without endless re-wiping.
What You’ll Need: Supplies That Won’t Break the Bank
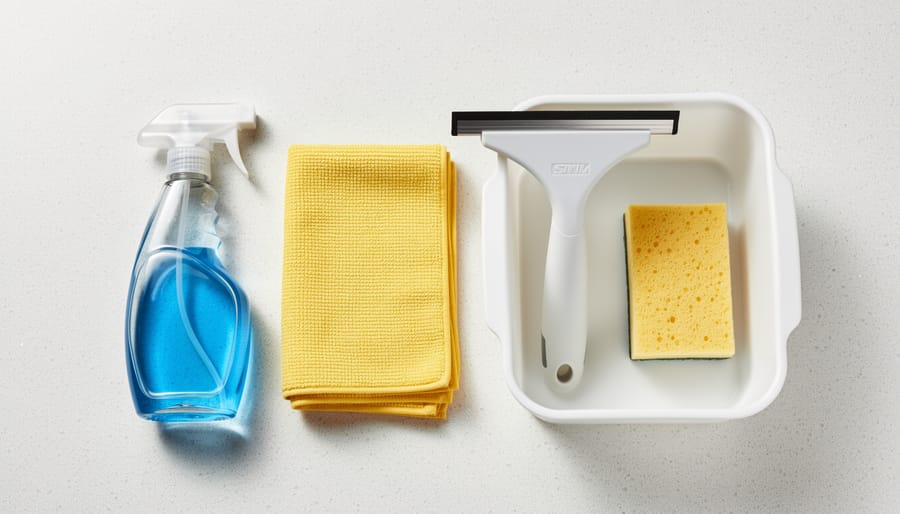
You probably have most of what you need already sitting in your kitchen or cleaning closet. This isn’t about buying expensive specialty products, it’s about using the right basics to get professional results. Here’s everything you’ll need to clean your windows streak-free:
Cleaning Solution (Pick One)
You can make your own or buy ready-made. For DIY, mix one part white vinegar with one part water in a spray bottle, this costs pennies and works brilliantly. If you prefer store-bought, any basic glass cleaner will do (typically $3-5), though skip anything with added oils or waxes that can leave residue. For tough grime, add a drop of dish soap to your vinegar solution. If you’re following a guide to streak-free windows you’ll know that simpler solutions often work better than fancy formulas.
Essential Tools
- Squeegee with rubber blade (6-10 inch width perfect for small home windows, around $8-12)
- Microfiber cloths, at least 2-3 (one for wiping edges, one for buffing, about $1 each or use clean cotton t-shirts)
- Spray bottle if making your own solution (often free if you repurpose an old one)
- Small bucket for rinsing (any household bucket works)
- Soft brush or vacuum attachment for dusting frames first
Nice-to-Have Extras
A step stool for reaching upper panes safely, old newspapers or coffee filters for final buffing (they leave no lint), and a scraper tool for stubborn spots like paint or stickers (around $5). Total investment if you’re buying everything new? Under $30. But chances are you’ll spend closer to $10 by using what you already own.
Before You Start: Quick Safety and Prep Tips

Before you grab your squeegee and start scrubbing, take five minutes to set yourself up for success, and safety. Window cleaning seems harmless, but falls from ladders send thousands of people to the ER every year, and a little prep now saves you from streaks caused by poor timing or messy conditions.
If you’re tackling second-story windows in your small home, ladder safety is non-negotiable. Use a sturdy ladder on level ground, never lean out to reach corners (move the ladder instead), and keep your belt buckle between the ladder rails. Better yet, consider telescoping poles with squeegee attachments for upper windows so you can clean from the ground.
Weather matters more than you’d think. Avoid direct sunlight because it dries your cleaning solution too fast, leaving streaks before you can squeegee. Overcast days are ideal, or tackle windows in the morning before the sun hits them. Skip windy days too, blowing dust will stick to wet glass and undo your work.
Protect your space by moving furniture a foot or two away from windows, and lay old towels along sills and floors to catch drips. In small homes where you can’t move much, just drape a towel over anything directly below the window. Remove curtains or tie them back so they don’t get soaked or in your way while you work.
The Streak-Free Method: Step-by-Step Process
Step 1: Remove Dust and Debris
Before you spray anything on that glass, grab a dry microfiber cloth or soft brush and sweep away loose dirt, dust, and cobwebs from the window frames, sills, and screens. This takes maybe two minutes per window but saves you from the most common mistake: turning dry dirt into muddy smears the second your cleaning solution hits the glass.
Start at the top of the frame and work down, paying special attention to corners where spiderwebs love to hide. Don’t skip the sill, that’s where most grime collects. If you’re planning to stage your home or just want it to look its absolute best, this prep step makes the difference between okay-clean and actually sparkling windows. A quick vacuum with the brush attachment works great for sills in small spaces where you don’t want dust flying around.
Step 2: Apply Your Cleaning Solution
Start at the top corner of your window and spray or apply your cleaning solution in a light, even mist across the entire pane. Work from left to right in horizontal passes, moving downward, this prevents solution from dripping onto areas you’ve already cleaned. Don’t oversaturate the glass. A light, consistent coating works better than heavy application, which creates runs and wastes cleaner.
In small homes, you can clean multiple nearby windows before wiping if you work quickly, but don’t let solution dry on the glass. That defeats the purpose and makes streaks harder to avoid. If you’re using a spray bottle, hold it about 6-8 inches from the glass for even coverage. For DIY vinegar solution, a slightly dampened microfiber cloth works just as well as spraying and prevents overspray on walls or furniture in tight quarters.
Step 3: The Squeegee Technique (Your Streak-Free Secret)
Here’s the truth: the squeegee is what stands between you and those frustrating streaks. Master this technique and you’ll wonder why you ever struggled.
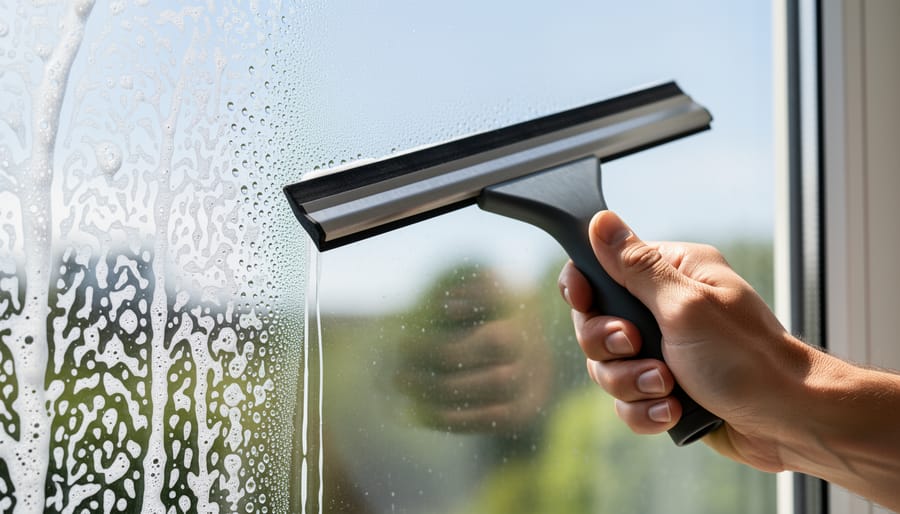
Start at the top corner of the window. Hold your squeegee at a slight angle (about 45 degrees works best) and pull it horizontally across the glass in one smooth, continuous motion. Don’t stop mid-stroke or you’ll create lines.
After each pass, wipe the squeegee blade with a clean, lint-free cloth. This is non-negotiable. That moisture and dirt on the blade will spread right back onto your clean window if you don’t remove it.
For your next stroke, overlap the previous one by about an inch. Position the squeegee so the top edge sits in the dry area you just cleaned, then pull across again. This overlap prevents those thin streaks between passes.
Work your way down the window in horizontal strips. Keep your pressure consistent and your speed steady. Rushing creates uneven coverage; going too slow lets the solution dry before you squeegee it.
In tight corners where the squeegee won’t fit, don’t force it. You’ll handle those spots in the next step with your microfiber cloth.
Step 4: Wipe Edges and Corners
Even the best squeegee technique leaves moisture along the window’s edges, and those drips will dry into visible streaks if you ignore them. Grab a clean, dry microfiber cloth and run it along all four edges of the glass where it meets the frame. Press gently but firmly to absorb any leftover cleaning solution.
Pay special attention to the corners, they collect water and are impossible to reach with a squeegee blade. Fold your cloth into a point or wrap it around your finger to get right into these tight spots. For small windows with narrow frames, this step takes just seconds but makes a huge difference in the final result.
If you notice the cloth getting damp, flip to a dry section. A wet cloth just smears moisture around instead of removing it.
Step 5: Buff to a Perfect Shine
After squeegeeing, you might notice faint streaks or a slight haze, especially when light hits the glass at certain angles. This final buffing step eliminates those imperfections and creates that crystal-clear shine.
Grab a clean, dry microfiber cloth (not the damp one you used for edges). Using circular motions, gently buff the entire window surface. The cloth picks up any remaining moisture and solution residue that causes streaking. Pay extra attention to areas where you overlapped squeegee strokes.
Old newspaper works surprisingly well for buffing if you have it on hand. The ink actually helps repel water, and the texture polishes without scratching. Just crumple a sheet and buff in circles until the glass squeaks.
Hold the window up to light from different angles to spot any remaining streaks. A quick re-buff usually takes care of them.
Don’t Forget the Screens and Sills
Your windows might be spotless, but grimy screens and dusty sills will undo all that hard work. Fortunately, these take just minutes to clean.
For screens, remove them if possible and lean them against an outdoor wall or place them in your bathtub. Use a soft brush or old toothbrush to gently scrub both sides with warm soapy water. Rinse with a garden hose or shower spray, shake off excess water, and let them air dry completely before reinstalling. If you can’t remove the screens, vacuum them with a brush attachment, then wipe with a damp microfiber cloth.
Window sills collect surprising amounts of dirt and dead bugs. Vacuum the sill first to remove loose debris, then wipe with your window cleaning solution or plain warm water and a cloth. Pay attention to corners where gunk builds up. For stubborn spots, let the cleaner sit for 30 seconds before wiping.
Don’t neglect the tracks either. Use a butter knife wrapped in a damp cloth to dig out accumulated dirt, or spray them with cleaner and wipe with an old toothbrush. These final touches make the difference between clean windows and a truly finished job.
How to Tell If You’re Done (And What to Do If You Still See Streaks)
Stand at an angle to the window and let natural light hit the glass from the side. Streaks and smears practically glow when light rakes across them, making them easy to spot. Walk to the other side of the window and check again, what looks perfect from inside might show streaks from outside, or vice versa.
If you see streaks after your final buff, the cause is usually one of three things. A dirty squeegee blade leaves lines with every pass, so wipe it clean and go over those spots again. Too much cleaning solution creates puddles that dry into streaks, less is genuinely more here. Or you might have skipped the dry buff step, which is where the magic really happens.
For stubborn spots that won’t budge, try a tiny dab of undiluted vinegar on a microfiber cloth and rub in small circles. Hard water deposits sometimes need this extra attention. If a spot still won’t come off, it might be on the outside when you’re cleaning the inside, or it could be paint overspray or mineral buildup that needs a razor scraper (use carefully at a shallow angle).
Here’s the truth: your windows don’t need to be absolutely flawless. If you’re only seeing a faint haze in certain light, you’re done. Chasing microscopic imperfections wastes time. In a small home, you’re standing close to your windows daily, so aim for clean enough that you notice the view, not the glass.
To keep results lasting longer, give windows a quick wipe with a dry microfiber cloth every two weeks. It removes light dust before it builds up and saves you from frequent deep cleans.
Time-Saving Hacks for Small Homes
Small homes have a secret advantage: fewer windows means less time cleaning. Work smart by tackling one room at a time and keeping all supplies in a caddy so you’re not running back and forth. Start with the most visible windows, usually your living room and any that face the street, since those make the biggest impact on curb appeal and how your space feels.
- Clean interior and exterior sides of each window in one pass instead of doing all interiors first
- Skip windows hidden by furniture or curtains if you’re racing the clock
- Keep a microfiber cloth near frequently-touched windows for quick spot cleaning
- Wipe down sills weekly to prevent dirt buildup that makes full cleans harder
Between deep cleans, a quick pass with a dry microfiber cloth removes fingerprints and light dust in seconds. Many of the same home organization tools that help you tidy between cleans work for windows too, a labeled caddy keeps supplies ready to grab. Apply these cleaning tips consistently and you’ll stretch results to three or four months instead of needing monthly scrub-downs.
Common Window Cleaning Questions
What’s the best time of day to clean windows?
Early morning or late afternoon work best, when direct sunlight isn’t hitting your windows. Bright sun causes cleaning solution to dry too quickly, leaving streaks before you can squeegee them away.
Does newspaper really prevent streaks?
Yes, but with a caveat. Newspaper works because it’s lint-free and slightly abrasive, but modern inks can transfer onto light-colored frames. Microfiber cloths are safer and just as effective.
How often should I clean my windows?
For most small homes, twice a year (spring and fall) keeps windows looking good. If you live near busy roads or have pets that nose the glass, you might need quarterly cleanings.
What if I have stubborn hard water spots?
Mix equal parts white vinegar and water, let it sit on the spots for 2-3 minutes, then scrub gently with a non-scratch sponge before following your regular cleaning routine. For severe buildup, you may need to repeat this treatment.
Can I skip the squeegee and just use cloths?
You can, but you’ll work harder for less consistent results. Squeegees remove more water in one pass than cloths can absorb, which is exactly why they prevent streaks so effectively.
These questions come up constantly because window cleaning seems simple until you’re staring at a streak across your clean glass. The good news is that most problems trace back to timing, tools, or technique, all of which you now know how to handle. If you’re dealing with windows that haven’t been cleaned in years, don’t expect perfection on the first round. Sometimes a second quick pass after they’ve dried reveals spots you missed, and that’s completely normal.
You’ve got this. Honestly, cleaning windows streak-free isn’t about fancy products or professional skills, it’s about using the right technique with tools you already have. And here’s the best part: your small home is actually an advantage. Fewer windows mean you can finish the job in under an hour and see immediate results throughout your entire space.
Spring cleaning doesn’t have to feel overwhelming. Start with one window, follow the squeegee method we covered, and you’ll be amazed at the difference. There’s something genuinely satisfying about looking through crystal-clear glass after you’ve done it yourself. The natural light floods in differently. Your rooms feel bigger and brighter. It’s one of those small wins that makes your whole home feel refreshed, and you earned it without breaking your budget or your back.